RECENT ARTICLES
-
Tour de France - My Dream Bike
-
FORGE - Your Questions Answered
-
On And Off: Putting It To The Test
-
Mastering the Cobbles: Your guide to riding the Paris Roubaix Sportive.
-
TIME TO CHANGE
-
Cycle to Work Scheme: Your Guide to Sustainable Cycling and Savings
-
Conquering the Strade Bianche: A Tale of Grit and Italian Charm.
-
Shimano Ultegra vs 105
-
Rounding The Corner: My Journey to the Strade Bianchi Sportive
-
WHY CHOOSE 105 Di2?
-
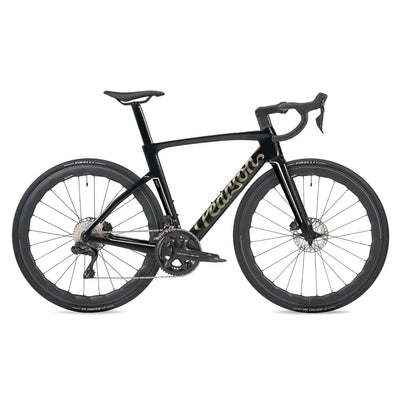
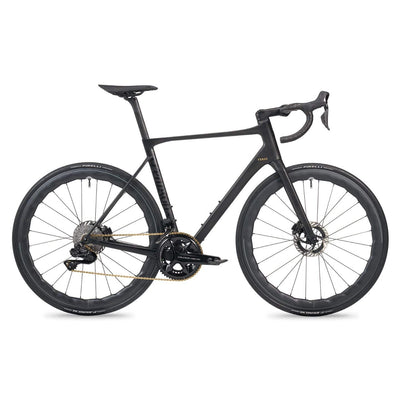
 ForgeUltegra
£6,350 -
 ShiftDura Ace
£8,350 -
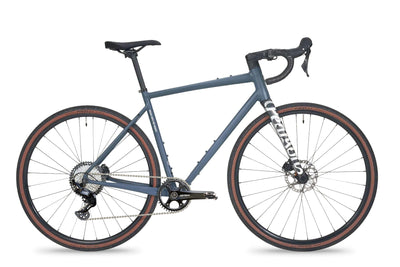
 ON AND ONGRX 820
£4,750£4,750 -
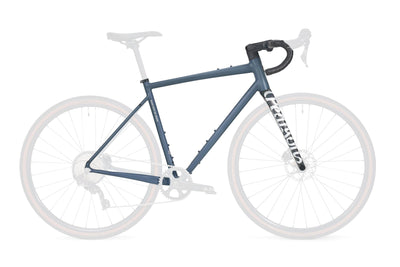
 Around The OutsideDrop bar GRX 815 Suspension
£7,500 -
 Rough With The SmoothIntegrated Aluminium Gravel Bike
£2,350 -
 Rough With The SmoothIntegrated Aluminium Gravel Frameset
£1,250£1,250 -
 ForgeDura Ace
£8,350 -
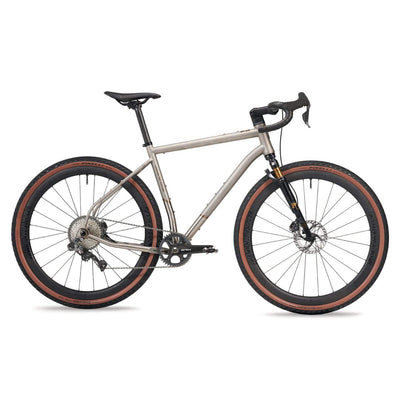
 ON AND ONGRX 815
£5,750£5,750 -
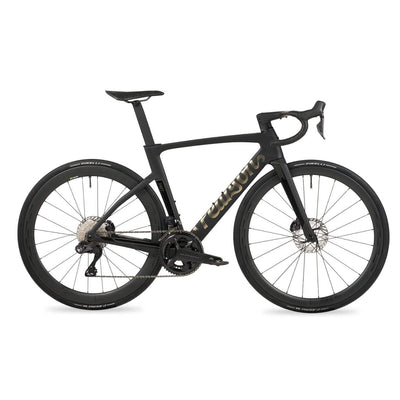
 Forge105
£4,550 -
 ShiftUltegra
£6,350
-
Most Popular


How to fit tubeless tyres

Tubeless tyres: what are the advantages?
We’ve covered this a little in our previous post on choosing road bike tyres. The key one for most riders is the puncture protection afforded by the sealant in the tyre.
A couple of weeks ago, I got back from a ride and noticed that the back of my seatpost was unusually dirty, considering that the winter roads had finally dried out. It was only a couple of rides later, when I got around to washing the bike, that I found that the dirt was actually a fairly substantial coating of sealant. I’d ridden on without even realising I’d had a puncture and with minimal pressure loss.
That puncture protection is a huge advantage - I’ve never had a flat in a tubeless road tyre that I haven’t been able to ride home (gravel riding is a different matter though).
As well as that self-healing ability, tubeless tyres don’t get snakebite flats, which means that you can drop your tyre pressure, which gives a more comfortable, compliant, grippy ride. They’re fairly uncommon when riding on road, but using tubes I've had them from rolling over larger stones that had fallen into the road.

Tubeless tyres have also been shown to roll faster than tyres with tubes. That’s because the inner tube moves against the casing in a tubed tyre as the tyre rotates and deforms, generating frictional loss. Tubeless is more efficient than either using latex inner tubes or tubular tyres.
There’s a small weight advantage over tubed tyres too, as although the tyre itself is built heavier than a clincher tyre designed to be used with tubes, by the time you’ve added in the weight of the tube, the tubeless tyre plus its sealant is lighter.
How to set up tubeless
First off, you need specific tubeless-ready components. Don’t try to set up a normal tyre or wheelset tubeless, as the tolerances needed for tubeless to work are close and may not be mirrored in non-tubeless kit. You may not be able to get an airtight set-up with non-tubeless-ready wheels and tyres and there’s a danger of the tyre blowing off the rim whilst riding, even if you do get it to seat.
The good news is that most new wheelsets like all our Hoopdriver wheels are tubeless ready. Many top-drawer wheelsets, including some wheels sold by Enve and Zipp are tubeless only.

You’ll also need a set of tubeless tyres - we’ve more on tubeless tyres in our post on tyre choice - along with tubeless sealant and a set of tubeless valves, which screw into the wheel rim. You may need tubeless-specific rim tape too. You can buy sealant, valves and tape separately, or you can find tubeless kits which bundle them together.
Many tubeless wheelsets come pre-taped and others, like Fulcrum’s 2-Way Fit wheels, come with a rim which isn’t pierced by the spokes and so is airtight without tape.
First tape your rims
If you do need to seal your rims with tape, that’s the first thing to do. Clean and dry the rim bed thoroughly then apply two layers of tape, making sure it’s tight on the rim, wrinkle-free. Overlap the tape so that it doesn’t begin or end at the valve hole.

You’ll need to pierce the tape at the valve hole so that you can fit the valve, but make sure that the hole you make isn’t too large, so that the tape seals around the valve base.
Next insert your valve
Push your valve through the valve hole and make sure that the rubber bung is seated firmly in the rim. Push down on the bung hard with your thumb as you tighten the locking nut on the outside, to make sure you get a good seal.

Now mount your tyre
The first bead is normally easy to get on the rim. Tubeless rims usually have a central depression and the bead will probably sit in this.
The second bead is usually a lot harder to mount. It’s worth persevering by hand, but if this doesn’t work you may need to use tyre levers to get it over the rim lip. Just be careful, as you don’t want to damage the tyre bead, as this may affect sealing. Smooth edged plastic tyre levers are the best bet.
Before you get the second bead fully mounted, you can add sealant by pouring it into the tyre. I prefer to do this, although you can also squirt it through the valve once the tyre is fully fitted (see later).

If you add sealant at this point, have the valve at the three o’clock position then rotate the wheel until it’s near the top. That way the sealant should stay in the tyre while you complete mounting it and it won’t get into the valve or flow out.
Although it isn’t always necessary, at this point, you can wet the wheel rim and tyre beads with a fairly strong detergent solution using a sponge, which helps with the next stage.
Seat your tyre
Now for the tricky bit. Put the valve so it’s near the 12 o’clock position and fit a track pump.
Often all it takes is a few vigorous strokes to get the tyre beads to pop into the slight depressions on the edges of the rim that help to hold them in place. Wheel and tyre tolerances have improved to the point where this is now the norm and usually works just fine for me.
If it does, then keep pumping. You’ll hear some worrying cracking sounds as the tyre fully seats against the rim, but keep going until you reach the recommended operating pressure for your tyre. You may see some bubbles from the soap where there are small air leaks. Massaging the tyre can help improve the tyre’s seating where this is happening.
No luck? Try manipulating the tyre beads towards the outside of the rim if they’re still sat in the central depression.

This is where you might have to resort to a reservoir pump, which stores up high pressure air and releases it quickly into the tyre. The faster rush of air can be enough to push the beads out against the rim. Removing the valve core might help here too (again, see below), although I’ve never found this necessary.
Reservoir pumps are pretty expensive, so a visit to a bike shop to ask for assistance might be another option. We offer tubeless set-up at our London store.
A CO2 canister is another way to get the necessary rush of high pressure gas to seat the beads.
How much sealant?
If you’ve not already added it, now’s the time to add sealant to your tyre. Shake the bottle of sealant well to make sure that the suspended particles that help seal leaks haven’t settled out.
Tubeless valves have cores that can be unscrewed. Most will come with a small plastic tool to grip the core. If you don’t have one, wrap the core in cloth or a strip from an old inner tube before using a pair of pliers - valve cores are delicate.

Smaller packs of sealant usually come with a nozzle to inject sealant through the valve stem. In general, you need between 30ml and 60ml of sealant per tyre, dependent on tyre width. Check sealant brands’ sites for recommendations.
Screw the core back in and inflate your tyre.
Has it sealed?
To get a good seal, spin the wheel around on its side, then flip it over and do the same for the other side, which will help distribute the sealant. You may find that the tyre is going down quite fast still, so you may need to inflate it a few times.
Riding the tyre up and down the road is a good way to get it to seat too - just don’t go too far until you’re sure it’s holding pressure. It’s a good idea to leave it overnight to check this.
It’s not fit-and-forget
Tubeless sealant will dry out over time, so you may need to top it up periodically. How often depends on temperature and on the sealant you’re using - and on whether you’ve had a puncture that’s sealed.
It’s a good idea to check the sealant level in your tyres every month or so and top up if necessary. To do this, pop a section of one of the beads and visually inspect the sealant level. The good news is that since you’ve only removed a part of one bead, it should be simple to remount it and get an airtight seal.
Milkit’s tubeless system is pricey but makes checking sealant levels easier. You insert a tube from a large syringe into its proprietary valve, suck out the sealant and measure it, top up the sealant in the syringe and reinject it into the tyre.

If going tubeless sounds like a bit of a pain, it shouldn’t. As mentioned, the majority of road tubeless wheel-tyre combinations will now go up easily and give you miles of riding without the dreaded 15 minutes by the side of the road fitting a new tube.
'How to choose the right tyres' read next >
'Why it's a good idea to upgrade your wheels' read next >